

Welcome to the first installment of our Honda ADV150 project, where we’re keeping things simple with some stylish bolt-on modifications. The goal of this project is to enhance the bike’s aesthetics and functionality, while maintaining the ability to easily return it to stock condition if needed. In this post, we’ll be swapping out the stock components for custom upgrades, all sourced from Aliexpress, making this a budget-friendly and accessible project for any ADV150 owner.
Here’s what we’ll be covering:
- Windshield Replacement: A sleek, more aerodynamic windshield to improve wind protection and give the bike a fresh look.
- Handlebar and Grip Upgrade: We’re switching out the stock handlebars and adding new grips for a more comfortable and controlled ride.
- Brake Levers and Oil Covers: Custom brake levers and oil covers not only enhance the bike’s appearance but also provide a personalized touch to your control setup.
- Headlight Grill Addition: For a more rugged, off-road-ready appearance, we’ll be adding a headlight grill to protect the front light and toughen up the overall look.
These upgrades require no permanent changes to the bike, so you can return it to stock condition anytime. Whether you’re looking to give your ADV150 a more personalized feel or simply curious about the possibilities of bolt-on modifications, follow along as we break down each installation step-by-step. Let’s get started!

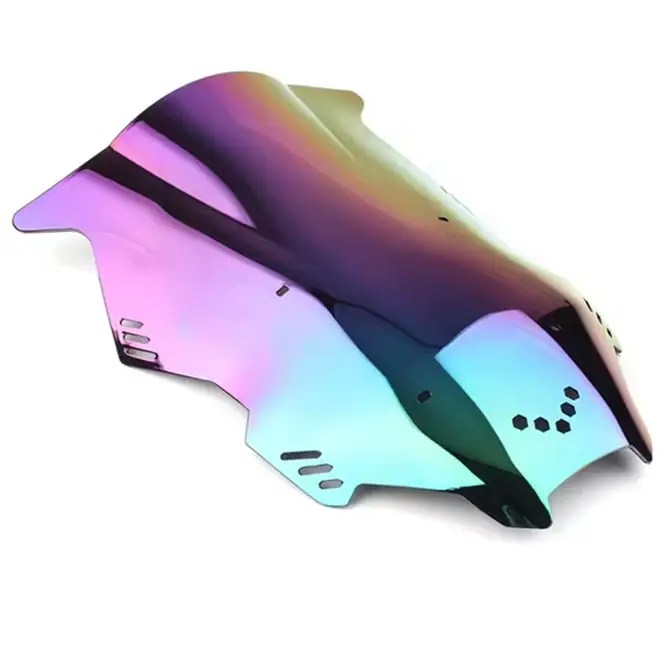
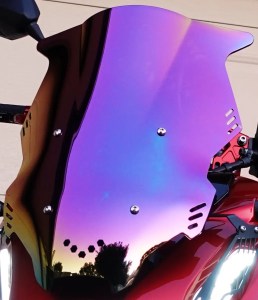
Windshield Replacement: Quick and Easy Upgrade
Swapping out the stock windshield on the Honda ADV150 is one of the easiest mods you can do, and it makes a noticeable difference in both style and functionality. This bolt-on upgrade requires minimal tools and can be completed in under 5 minutes.
Tools Needed:
- Allen Key: That’s all you need!
Step-by-Step Process:
- Locate the 4 Bolts: The windshield is secured by four bolts, easily accessible at the front of the bike. Using your Allen key, carefully unscrew each of these bolts.
- Remove the Stock Windshield: Once the bolts are out, gently pull the stock windshield away from the bike. It should come off easily with no additional clips or fasteners holding it in place.
- Install the New Windshield: Align the new windshield with the bolt holes and hand-tighten the bolts to hold it in place. Once everything is lined up, use your Allen key to securely tighten the bolts.
- Final Check: Give the windshield a quick check to ensure it’s secure and properly aligned.
That’s it! In less time than it takes to make a cup of coffee, you’ve transformed the look of your Honda ADV150 with a sleek new windshield. This easy mod not only adds to the bike’s aesthetic but also improves wind protection on your rides.
Total cost: $59.83 AUD
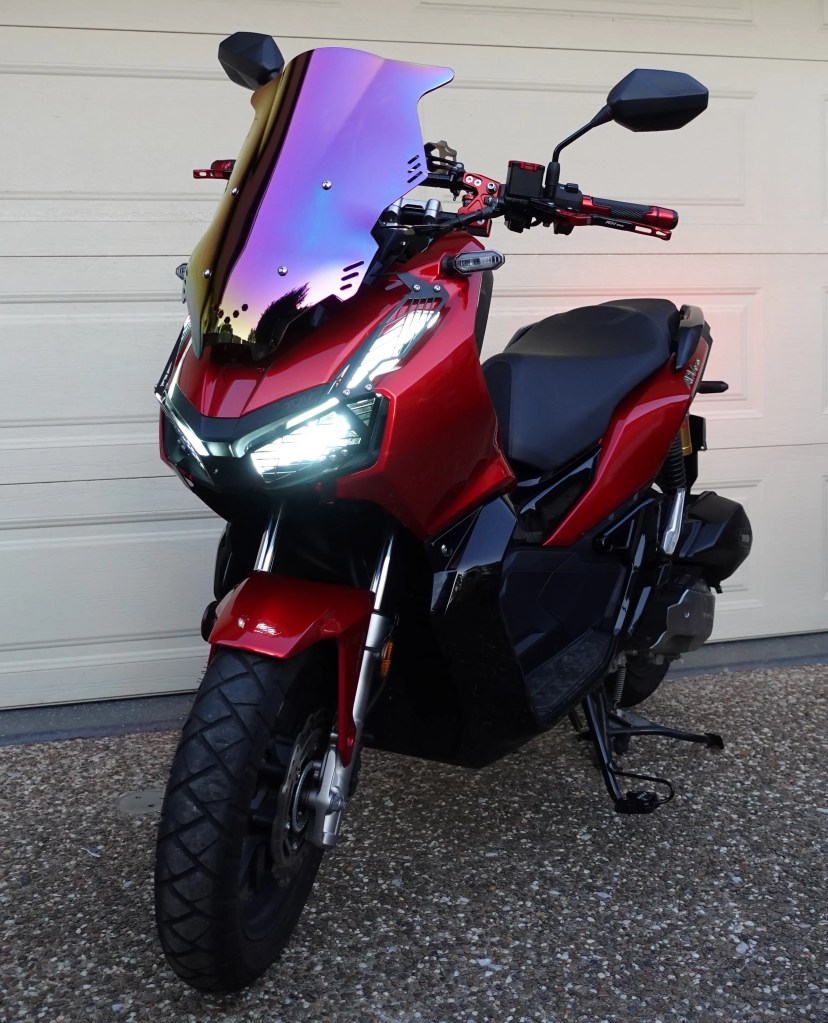
The new windscreen is narrower and taller than the stock screen but does seem to offer better wind protection when the screen is in the up position. Time will tell how well the iridum coating holds up.
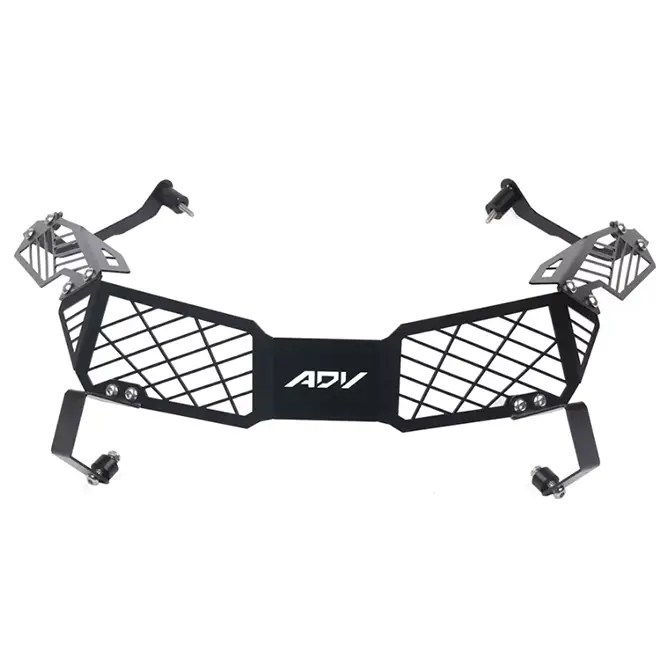
Headlight Grill Installation: Adding Style and Protection
Next up is the installation of the headlight grill, a great addition to give your Honda ADV150 a rugged, adventure-ready look while adding some protection to the headlight. This simple bolt-on mod took just under 10 minutes, with most of the time spent assembling the grill itself.
Tools Needed:
- Allen Key
- 10mm Spanner
- Loctite Threadlocker (for securing the bolts on the grill assembly, not for the bolts into the frame)
Step-by-Step Process:
Assemble the Grill
Start by assembling the headlight grill, this is where the Loctite threadlocker comes in handy. Apply a small amount to the bolts securing the grill pieces to ensure they stay tight over time. Be careful not to overtighten the bolts to avoid damaging the grill.
Position the Grill and Attach to the Frame:
Once assembled, position the grill in front of the headlight. It should fit snugly over the existing headlight with the mounting points aligning to the frame.
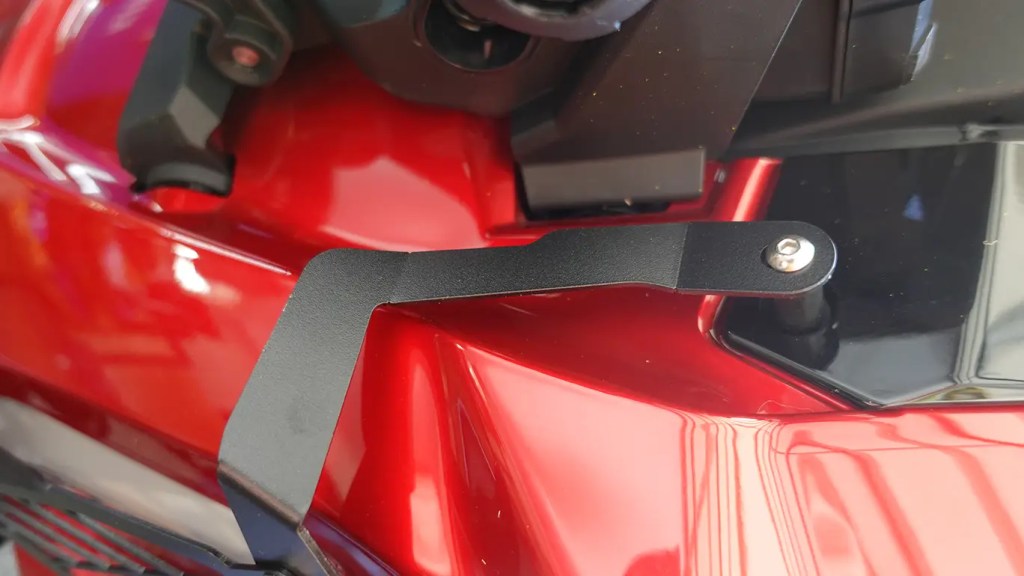
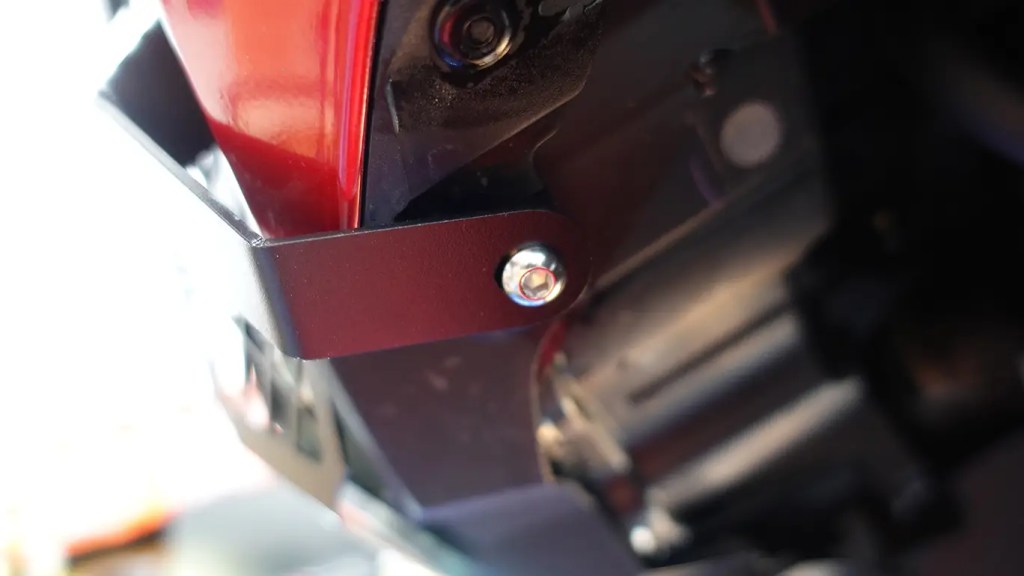
The original bolts up under the windshield are replaced with a longer bolt and spacer. On the underside there were existing holes for the grill to attach to. It is recommeded to use a washer under the nut and make sure to use a nylon nut.
Once the grill is in place, make sure everything is securely tightened and aligned properly with the headlight.
And that’s it! The headlight grill is now installed, giving your Honda ADV150 an off-road-ready look while providing extra protection to your headlight. This simple, yet impactful, addition not only improves the bike’s aesthetics but also adds a practical layer of defense during your rides.
Total cost: $36.84 AUD

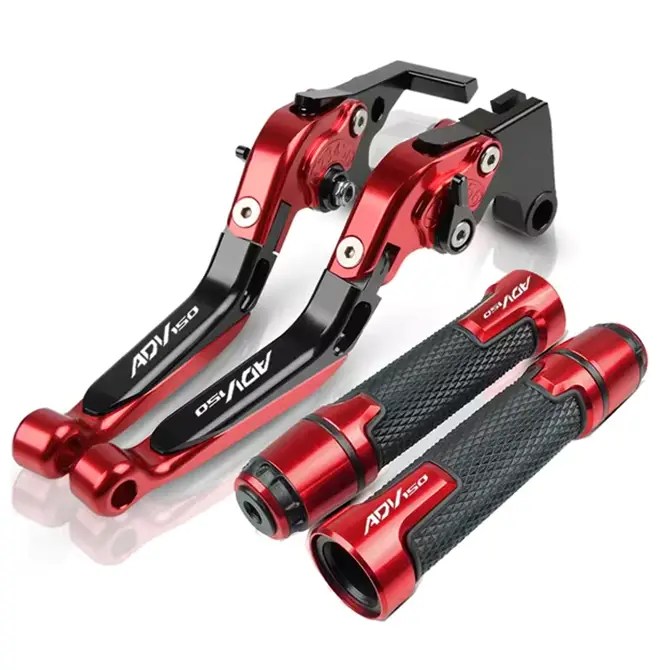
Handlebar, Grips, and Lever Replacement: The Most Challenging Mod
Replacing the handlebars, grips, and levers on the Honda ADV150 is one of the more involved modifications in this project, primarily due to the difficulty of removing the stock grips and making adjustments to fit the new throttle tube and switch clusters. While it takes a bit more time and precision than the other upgrades, the end result is well worth it for improved comfort, control, and aesthetics.
Tools Needed:
- Allen Key
- Large Phillips Head Screwdriver
- Flat Screwdriver
- Drill with a 5mm Drill Bit
- 10mm socket or spanner
- Course File
Step-by-Step Process:
Remove the Brake Fluid Reservoirs
These just unbolt off the handlebars. Once removed make sure they stay as upright as possible, this can be done by resting them either side of the instrument cluster.
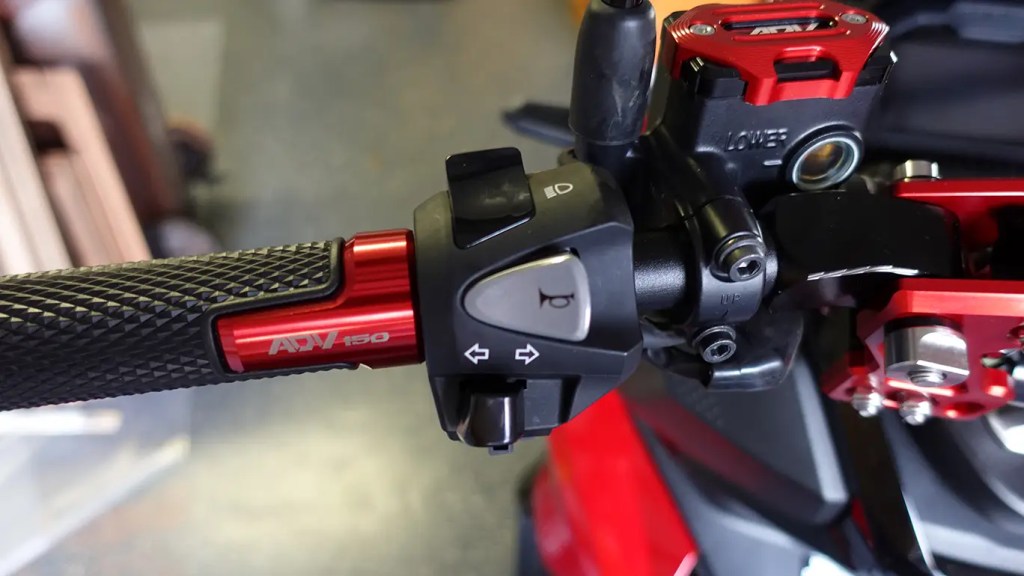
Remove the Throttle Side Bar End and Button Clusters and Handlebar
This should be secured with a large phillips head bolt. Both of the button clusters can be unscrewed using a phillips head screwdriver.
The button custers will be in two parts to make for easy removal. you can leave the left bar end and grip on the old bar if you are not using them on the new setup.
The old handlebar can then be removed using an allen key. to remove the plastic caps from the allen bolts use a toothpick if you can use your finger nails to prevent damaging them.
Remove the Old Grips
The hardest part of this upgrade is removing the old grips. If they’re stuck on tight, you may need to use compressed air or a grip remover to carefully peel them off. Be patient and avoid tearing them if you plan to keep them for future use.
Address the Throttle Tube Issue
The original throttle tube has raised rings on either end that prevent the new grip from sliding on smoothly. You can carefully trim these rings with a sharp blade or a rotary tool, but be cautious not to damage the throttle tube itself.
Once trimmed, you can slide the new grip onto the throttle tube. Leave a 5mm gap at the end of the tube, as this is necessary for the throttle tube to fit back into the button cluster correctly. As you get close to sliding the grip all the way on the tube test the tube fitment on the button cluster to make sure there is a 1mm gap between the custer and the grip.
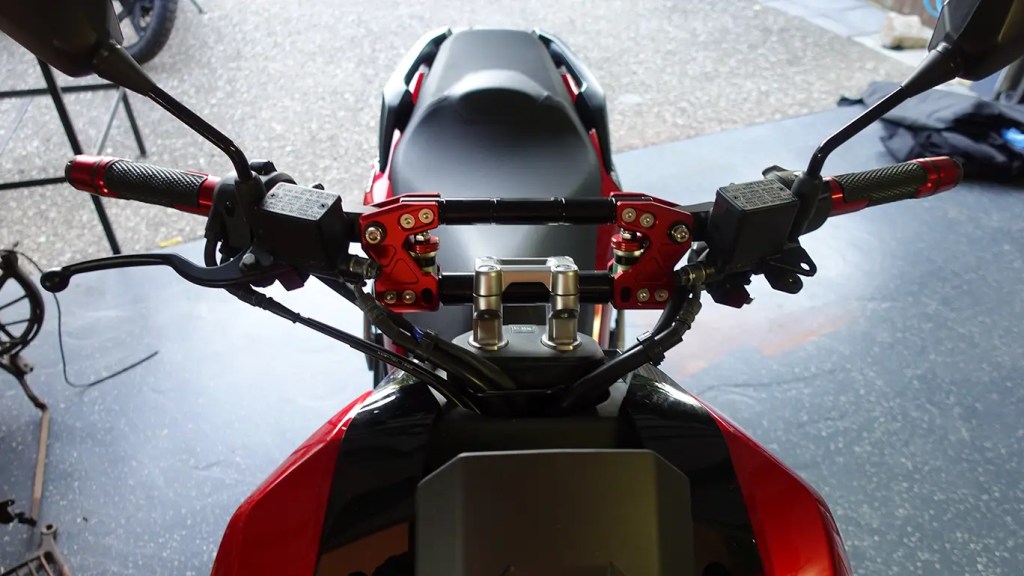
Install the New Handlebars
Install the new handlebars and make sure they are aligned and secure. If you’re using shock-absorbing handlebars, disassemble the right side of the bar to make sliding the throttle tube over the end of the bar easier.
Dry Fit the Switch Clusters
The handlebar switch clusters have a small notch that must be aligned to a hole drilled into the handlebars. First, dry fit the switch clusters onto the new handlebars to find the exact spot where the notch should sit.Once you have marked the location, use a drill with a 5mm drill bit to make the hole in the handlebars.
Tip: It’s technically possible to skip this step, but if you don’t drill the holes, the switch clusters can twist while riding, which can be dangerous. We highly recommend taking the time to drill the holes.

This is the best time to find the best position of the handlebars and controls. You may find that you prefer to have them tilted forwards or backwards. In my case I found that I wanted the left button cluster to be twisted forward so the indicator switch is higher and my thumb posisiton is the same for the idicator on all my bikes. Honda like to have the horn and indicator switch in an oposite order than most other makes.
Reassemble and Secure the Throttle Tube
Once the holes are drilled and the clusters are in place, carefully reassemble the throttle tube and fit it back into the button cluster. Ensure the 5mm gap at the end of the grip is maintained, allowing everything to fit together without interference.
Refit the Brake Fluid Reservoirs
This is just the reversal of the removal. Make sure to have the Reservoirs level.
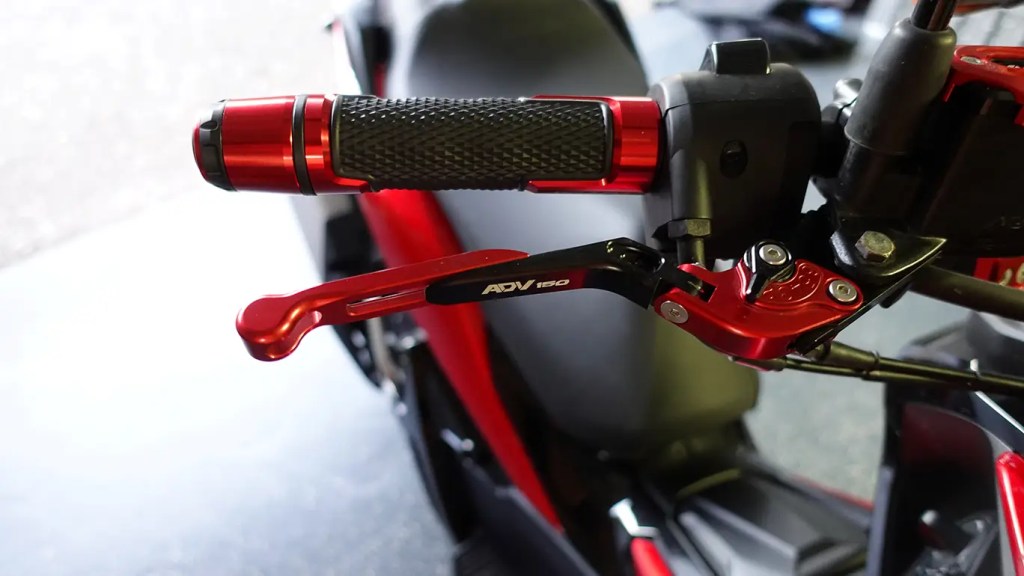
Install New Levers:
Using the spanner and flat screwdriver, remove the stock brake levers and replace them with the new ones. Ensure they are secured properly and move freely.
Final Adjustments
Make sure everything is tightened down securely, from the handlebars to the grips and switch clusters. Test the throttle movement and ensure there is no resistance or interference with the button cluster.
Total costs:
Shock-Absorbing Handlebar: $172.90 AUD
Brake Levers & Grips: $63.29 AUD
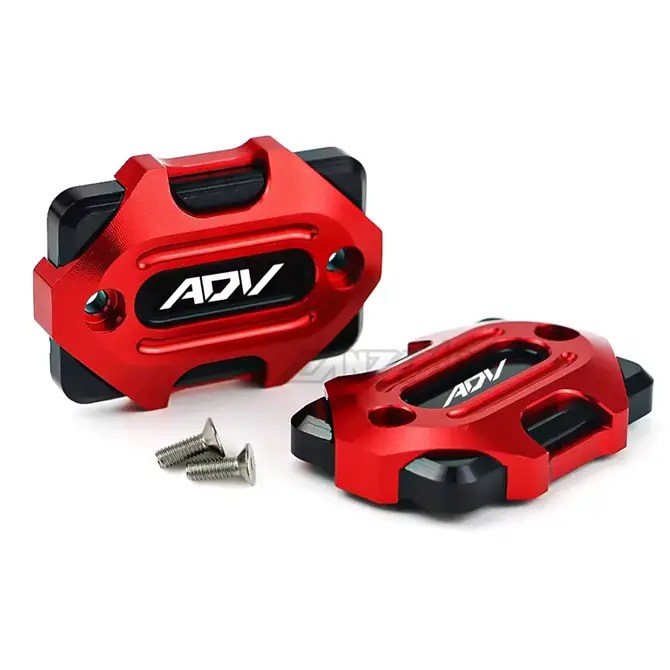
Brake Fluid Cover Replacement: A Simple, Stylish Upgrade
Replacing the brake fluid covers on the Honda ADV150 is one of the quickest and easiest modifications you can make. It adds a personal touch to your bike’s controls while requiring only a few minutes of your time. The process involves minimal tools and effort but offers a nice aesthetic upgrade.
Tools Needed:
- Phillips Head Screwdriver
Step-by-Step Process:
- Remove the Existing Covers:
- Start by locating the brake fluid reservoirs, one for the front brake and one for the rear.
- Each reservoir is secured with two screws on the top. Using a Phillips head screwdriver, carefully remove these screws and set them aside.
- Remove the Old Covers:
- Once the screws are out, gently lift off the existing metal cover.
- Beneath the metal cover, you’ll find a white plastic cover. Carefully remove this as well, taking care not to disturb the gasket that seals the reservoir.
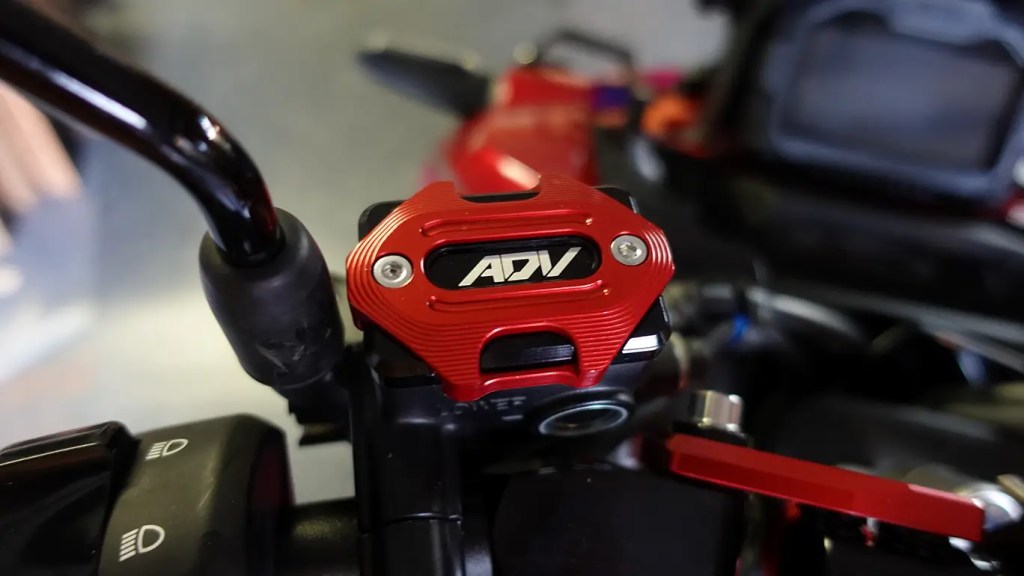
- Install the New Covers:
- Place the new brake fluid cover over the reservoir, ensuring the gasket stays in place and aligned. The gasket is essential for preventing leaks, so double-check that it hasn’t shifted out of alignment during installation.
- Secure the New Cover:
- Once the cover is properly positioned, replace the screws you removed earlier and use the Phillips head screwdriver to tighten them down securely.
Wrap-Up:
That’s it! In just about 2 minutes, you’ve upgraded the look of your brake fluid reservoirs with minimal effort. This quick modification enhances both style and functionality, adding a clean, custom touch to your Honda ADV150. Be sure to check that the gasket is in place to avoid any leaks, and you’re good to go!
Total costs: $24.60 AUD
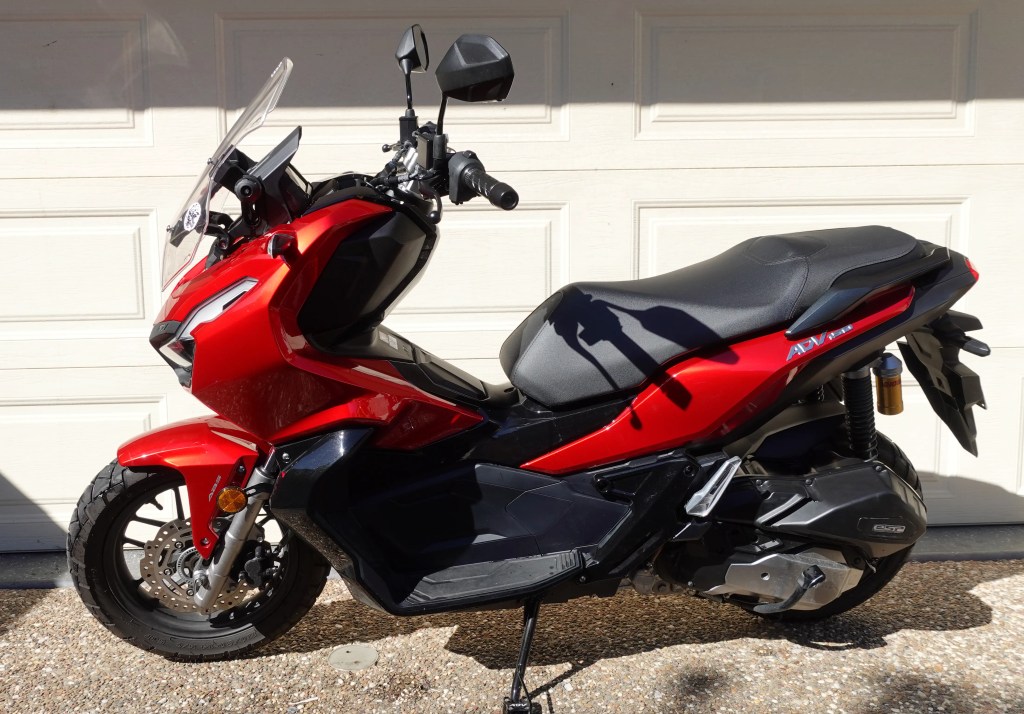
Easy Mods, Big Impact
With just a few bolt-on modifications, we’ve transformed the look and feel of the Honda ADV150 without making any permanent changes to the bike. From a sleek new windshield to comfortable handlebars, custom grips, levers, brake fluid covers, and a rugged headlight grill, these upgrades not only enhance the bike’s aesthetics but also add functionality and a personal touch.
What makes this project great is the simplicity—each part was sourced from Aliexpress, and all the mods can be done with basic tools and minimal time. Plus, with no major alterations, you can easily return the bike to its stock condition if needed.
If you’re looking to customize your ride without diving into complicated mechanics, these straightforward bolt-on upgrades are a perfect place to start. Stay tuned for more updates on this build and feel free to share your own experiences with modifying your Honda ADV150 in the comments. Happy riding!

Leave a comment